Prepping for SHIPtember: Design, Stability and Parts

When summer is approaching, I inevitably start thinking about SHIPtember. June, July and August will fly by in the summer rush, and suddenly, September is here—and I hate going unprepared into SHIPtember. Although I must admit, some of my personal favorite SHIPs have been born out of zero planning and sheer desperation.

I have participated in SHIPtember (almost) annually for over ten years now, and I have some insight I would like to share with you. If you are new to SHIPtember or have been a SHIPwright for many years, it’s a good idea to prepare!
What is SHIPtember?
SHIPtember is an annual event where participants are tasked with the mission of building a spaceship that must measure more than 100 studs in any direction during one month (September). It was started in 2013 by fellow BrickNnerd Simon Liu. The focus of the event is just as much about the process of building and sharing WIP shots as it is about producing fantastic-looking spaceships. The community all comes together on Discord and Flickr asking and giving each other advice.

M.U.ULLA 215 by LEGOLIZE IT MAN

Dreadful Angel by Jonathan Walker

Comierre Battle Cruiser by Isaac Snyder
SHIP is written in capitals because it’s an acronym, meaning Seriously Huge Investment in Parts. Participating in this event requires a fair amount of LEGO, although the investment in parts is not that big from year to year.

Naviglio V-714 by Loïc Gilbert

Parakeet by Pico van Grootveld

Phoenix by nu_montag
The spaceship can be at least 100 studs in length, width, or height, as long as any direction exceeds the 100 stud mark. Most shipwrights start by building a 100-stud ruler and taking photos of it to show the world they are ready to go.

Myself

Nathan Simkiss

Simon Liu
The event isn’t really a competition, and there is no prize. However, there is a vote for the People's Choice award. Also, the SHIPs scoring 1st, 2nd, and 3rd place in the vote will be featured in the middle of the fabled SHIPtember poster that is produced every year.

The fabled SHIPtember poster by BetaNotus
Planning To Build A SHIP
I personally don’t have droves of LEGO in every color imaginable. I have “a lot” of LEGO, but not that much. I can probably build a gray SHIP with parts I currently have at home, but there are so many gray SHIPs out there, and it’s difficult to build something novel. This is why it’s a good idea to start planning some months in advance and start buying parts in colors you need more of.
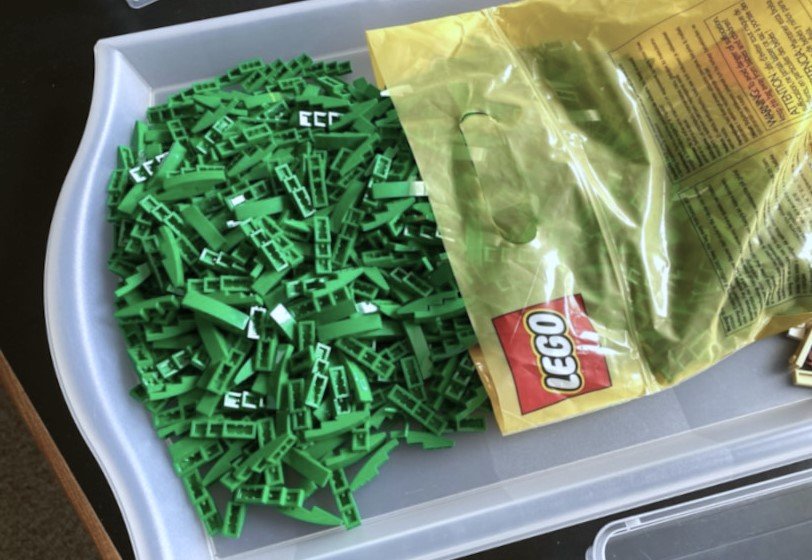
Sometimes you need to buy large amounts of green curved slopes
It’s also a good idea to start thinking about the design. Do you want to build a SHIP based on an existing model? Maybe based on a sketch? Do you want to create something entirely based on your own designs? These are some approaches and how to prepare for them.
Building A SHIP Based On An Existing Idea
This one is the hardest, in my opinion. Even when you’re not limited to only one month of building, I don’t like to cage my creativity into a set frame. If I don’t get all the details right, I might lose interest in the MOC before I’m done.
View fullsize
View fullsize

On the other hand, the design is already there. You know it’s a cool SHIP, and if you can make it, you know the result will be awesome (like the two SHIPs above by Anders Horvath).
When you are basing your MOC on an existing design, you can go about it two ways: try to copy the look of the original in as much detail as possible or loosely base your MOC on the original design.
My recommendation is to choose the latter, especially if you are not used to building huge SHIPs. When I built the Moth, I based it on an existing artwork by John Wallin Liberto. There is only one image of the ship from one angle. That made it easier for me to finish my MOC. I didn’t feel I had to get every angle and detail just right because there was still so much left to the imagination.
View fullsize
View fullsize

Alongside the guidelines for building a SHIP based on preexisting works, make sure you have enough bricks in the right color and that you build a SHIPtember ruler (100 studs in length) to get a feel of how big the SHIP will be.
Build A SHIP Based On Your Own Imagination
This is the kind of building SHIP building I find most rewarding. It’s a special feeling to see your own idea take form in front of your eyes. It can be very challenging, but I have some advice to get you started.
Make a “mood board”
I use Pinterest a lot. It is really good at finding images and giving you suggestions for other artwork that you might like. Start by just searching for “spaceship” and you will get a list of image suggestions. Click on one that you like, and Pinterest will then give you more suggestions based on the image you liked. You can then create boards where you can gather similar artwork. For example, you could have one board called “Biomechanical Spaceships,” one called “Colorful Spaceships” and so on. This is a good way to find and organize ideas of what you want to build.

My mood board for SHIPtember 2016
Sketching
If you already have an idea, try to make a sketch with pencil and paper. Maybe you only have an idea of what you want the front of the SHIP to look like. Make a sketch of it and then try variations of the rest of the SHIP. When I built the Malediction it started with a sketch. All I knew was that I wanted it to look “Star Wars-y.” At some points during the build process, I didn’t know how to continue. I then printed images of the unfinished SHIP and drew on it with a pen to figure out how to proceed.
View fullsize
View fullsize

Seed Parts
I have used this method a few times. I start with a specific part that I want to use. I hold it in front of me and try different angles. What I like about this approach is that you give your imagination a framework to start from. It’s much easier than to just start with a blank slate.
View fullsize
View fullsize

Just winging it
Winging it is also an option of course. You can just start building and see what happens if that’s what you are used to. I have only tried that once, and even though I like that SHIP, it’s not one of my favorites. I didn’t have a plan and the back section of the SHIP was just something built in desperation in the last days of September.
I had no plan for this SHIP. It was an experiment from start to finish.
If you choose this path, at least take a moment to read the next chapter about how to choose a strong frame for your SHIP!
A SHIP’s Structural Integrity
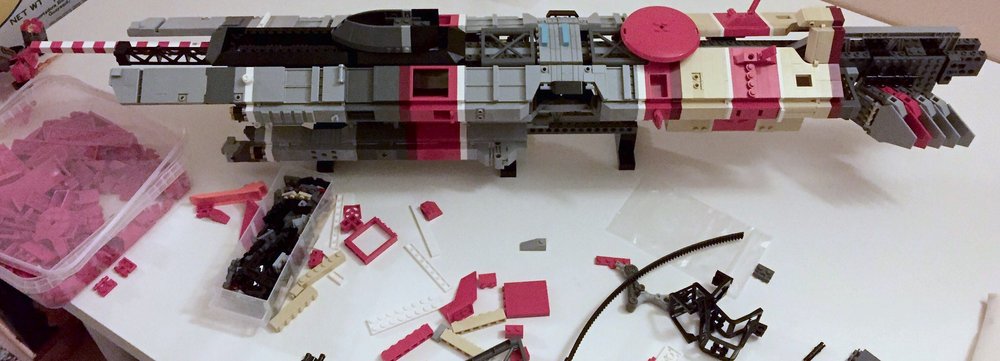
Whatever design you choose for your SHIP, you will need to consider how to build a strong frame. If you are planning on a colossus with many protruding parts, you might need more parts than if you are planning on a smaller and relatively flat SHIP. Do you have enough Technic bricks to reach 100 studs? Do you even need Technic bricks? Let’s find out.
My first SHIPs were not big enough to have problems with internal strength or gravity. I also made them stand on two or more supports, so I didn’t really have to care much about the strength and weight. It was not until later that I felt it was important that the internal structure could actually support the SHIP, meaning it shouldn’t need a lot of support. One “leg” should be enough.
In 2014, I came across this article and it was very helpful. I still use the image below by Hiub Versteeg as a reference for how to build a strong frame.
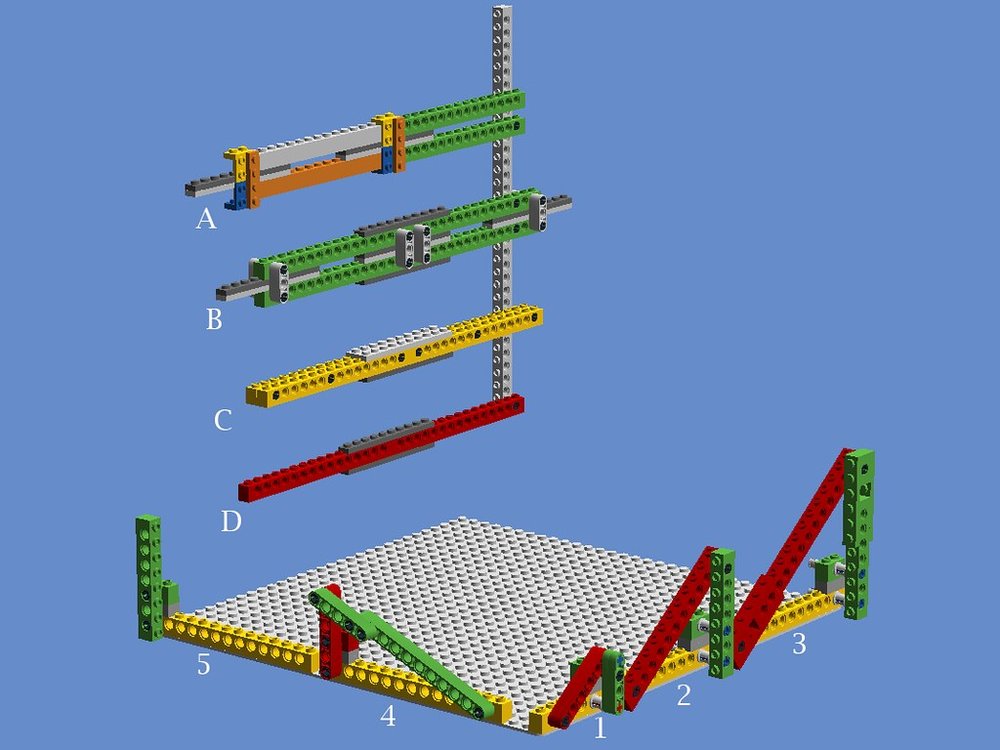
SHIPtember basics by Huib Versteeg
I had a lot of Technic parts so it was natural for me to go with option B. But lately I have started exploring variants of option A instead, and I am very pleased with the results. I have no scientific evidence that option A is stronger, but now I think the time has come to settle the score!
The method I will use for testing the rigidity of the beams is to hang a bucket of water under them. My intention is not to make the beams break, but instead load them with equal weights and then measure the droop.

My laboratory!
The brown “plank” is a book shelf that I will use as my reference. I will place the beam between the two tables. After that I will hang the bucket under the beam. I have chosen a completely arbitrary weight of 2 kg (4,4 lbs.). Seems like a reasonable weight for a SHIP right?
Bricks and plates beam (Option D)
This beam is built from just one row of bricks with plates over and under covering the gaps. It is incredibly weak and It can not even hold its own weight when it reaches 100 studs in length, which is not a good start. Let’s add some weights.

It’s already drooping
Result: It broke the beam. This one is the weakest in the test.

FAIL!
Technic and plates beam (Option C)
This beam uses Technic bricks placed in two rows so that the gap between every brick does not align with the gaps in the other row. I also used Technic pins to connect the Technic bricks. 2x plates are then used over and under the construction for extra strength. Now let’s add the weight.

It didn’t break!
I’m measuring from the underside of my reference to the underside of the beam.

Result: The droop is 46 mm. I’m actually a bit surprised it held.
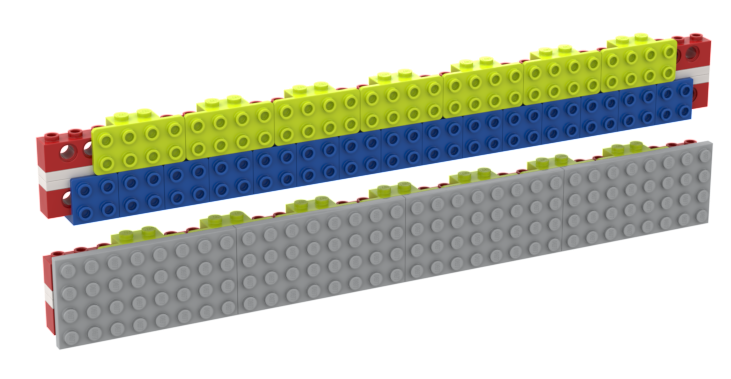
Locked Technic bricks and plates beam (Option B)
This beam is built with two layers of Technic bricks with two layers of plates between them. The rows are then locked with 3L lift arms. Now we’re getting somewhere! This is the frame that I have used for most of my ships.

Slight droop
Result: The droop is 28 mm. Pretty good!
Bracket beam (Option A)
This technique has two layers of Technic bricks with two layers of plates between. The two rows are then locked with brackets covering every gap between the bricks.

Significant droop
Result: The droop is 30 mm. Disappointing! A is not stronger than B.
Brackets beam (modified Option A)
Ok, I need to add some strength to that last beam. In my latest SHIP, I used option A, but I also covered the structure with brackets and then 4 x [x] plates across the entire length of the beam.
The result seems very rigid. I modified option A like my example above and put it to the test (the row of plates are turned away from the camera for stability reasons).

Result: The droop is 19 mm (!) Success!
If you plan to build a big SHIP you better make sure you have a lot of Technic bricks and/or brackets at home when September nears!
Ordering Parts
Now you hopefully have a clear plan of what you want to build. It’s time to start taking inventory of your LEGO collection and make sure you have all the parts you need. If not, you now have a few months to make orders before it’s time to start building. This is where BrickLink and LEGO’s Pick a Brick service come in handy, as long as you factor in lengthy shipping times for the latter if you need less-common parts.
Some SHIPwrights like to start out building a digital SHIP, then order all the necessary parts for building it in plastic. I personally find that very stressful and try to have my orders in place long before September starts. I still usually end up having to make some desperate last minute orders!
September might seem far away but it will be here in a flash. I hope my little guide will be of some help to you all!
Do you usually prepare for SHIPtember? How? Please tell us in the comments!
Do you want to help BrickNerd continue publishing articles like this one? Become a top patron like Charlie Stephens, Marc & Liz Puleo, Paige Mueller, Rob Klingberg from Brickstuff, John & Joshua Hanlon from Beyond the Brick, Megan Lum, Andy Price, Lukas Kurth from StoneWars, Wayne Tyler, Monica Innis, Dan Church, and Roxanne Baxter to show your support, get early access, exclusive swag and more.