Six-Wide: How to Fit a Minifig in a Custom Car
I have a niche. I think a lot of LEGO builders do. Sure we like to expand our array of techniques, push our boundaries, and build outside of our comfort zone. We like to experiment with different concepts, themes, and scales. But at the end of the day, a lot of us have that comfort food type of build we like to return to; that one thing that we fall back on; that one thing that we do the best, or at least have the most fun doing.
For me, that’s building 6-stud-wide Speed Champions cars, and specifically muscle and sports classics. That’s so specific, right? It might at first thought feel as if there isn’t a ton of water to draw from this well. When I began working in the 6-wide scale once I made two or three cars, I thought I might have figured out the formula for this kind of car and that any future MOCs in the genre might be formulaic.
It turns out there is a ton of room to develop techniques and solve problems within the 6-wide scale of cars. I look at each of the little cars I build as its own self-contained puzzle to solve. To be sure, I borrow elements from previous builds and adapt them as is helpful for the current car. Most of the time I attempt a car that I just have no idea how to build, ignoring elements from the previous builds, opting instead to hack through the obstacles. The completed model of these efforts tend to be the most rewarding MOCs by far.
Still, I certainly have built up an arsenal of techniques that I can at least try to apply situationally. I have a stable of elements, connections, and applications that can work well as a foundation or a solution, and I’ve decided to share a few of those here. This is far from a comprehensive look at every weird or esoteric solution I’ve come up with to “solve” a car—rather a set of techniques that I think are universal enough that they’re worth sharing for other car builders, seasoned or aspirational!
The Chassis
Seated LEGO minifigures are still quite tall, and that simple fact typically leads to resultant cars that are quite tall. Most sedans and coupes in reality are shorter in height than many people, but LEGO models of cars are almost always going to be taller due simply to the restrictions of the medium. Still, we can do our best! When we build our chassis, our plan is to get minifigs as low to the ground as possible, as that will enable us to reduce the overall height of the car.
Consider this: a minifig, in the seated position and wearing either short hair or a helmet, is 11 plates in height.

Let’s say we seat that minifig on a plate, and we assume the car we’re building has a roof. We also need ground clearance so the plate isn’t sitting on the ground. Now our total height for this car is 14 plates off the ground.
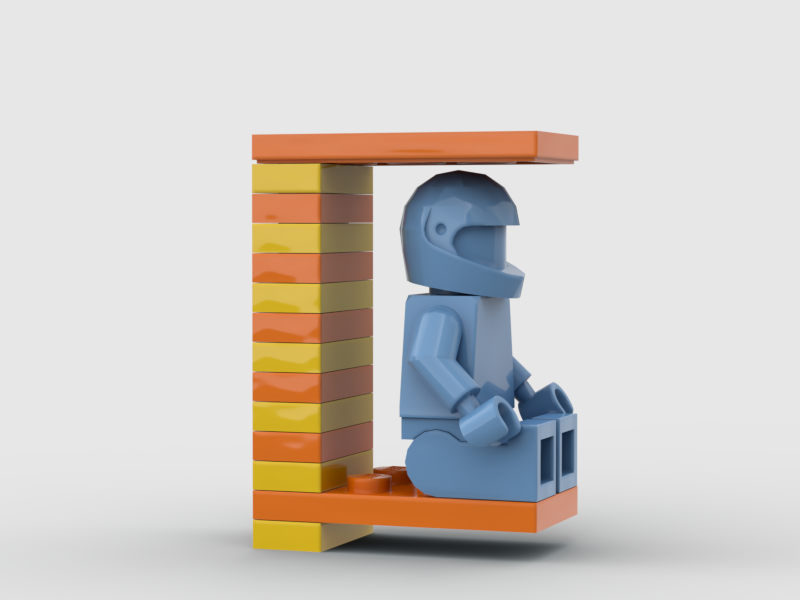
There’s not much we can do about the height of the roof. To reduce the height of the fig, we’d need to lean them back—which we CAN do… but we’ll try to avoid for aesthetic reasons. As for the chassis, that’s easier to approach. If the fig sits on something thinner than a full plate then we wouldn’t need that extra full plate’s height for ground clearance underneath it. The standard and most obvious way to achieve this is with a vehicle base.
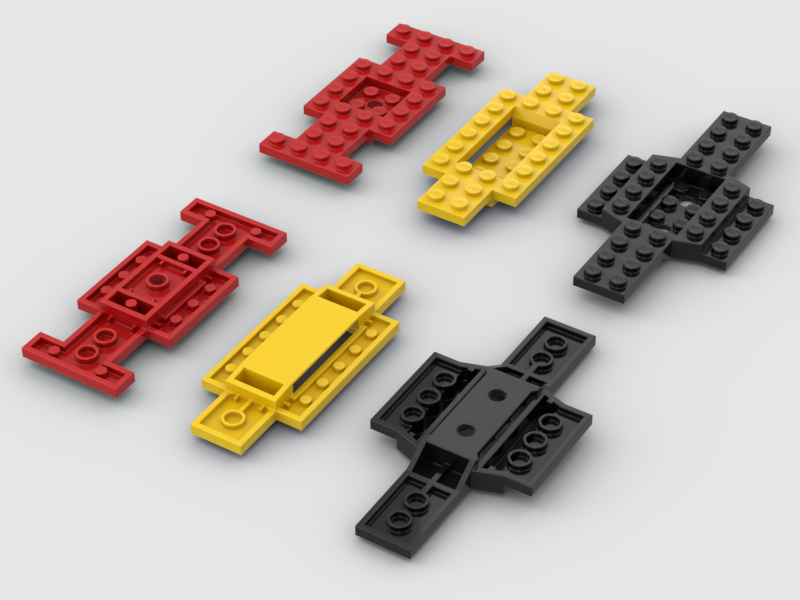
A few types exist, but we’ll only be looking at the middle one, 30029 (aka Vehicle, Base 4 x 10 x 2/3 with 4 x 2 Recessed Center with Smooth Underside… rolls right off the tongue, right?). The left one’s bottom-most plate is too thick, and the right one is longer and has a bunch of supports and angles that just make it more difficult to use.
30029 offers us a lot of utility. Not only does it drop a minifigure to sitting just 1 plate off the ground without collision, but it offers a lot of strength to a build, being one solid element. This is the chassis solution I like to use in any situation where I can since it so neatly solves our issues.
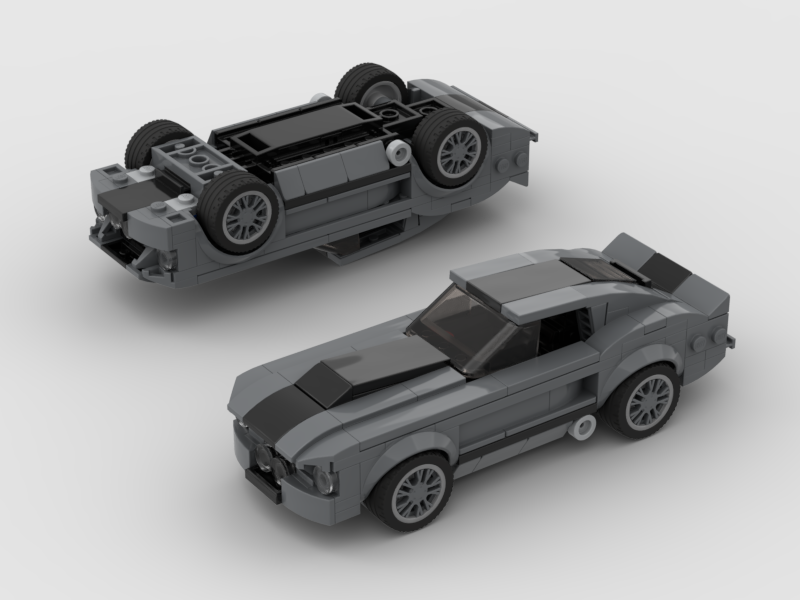
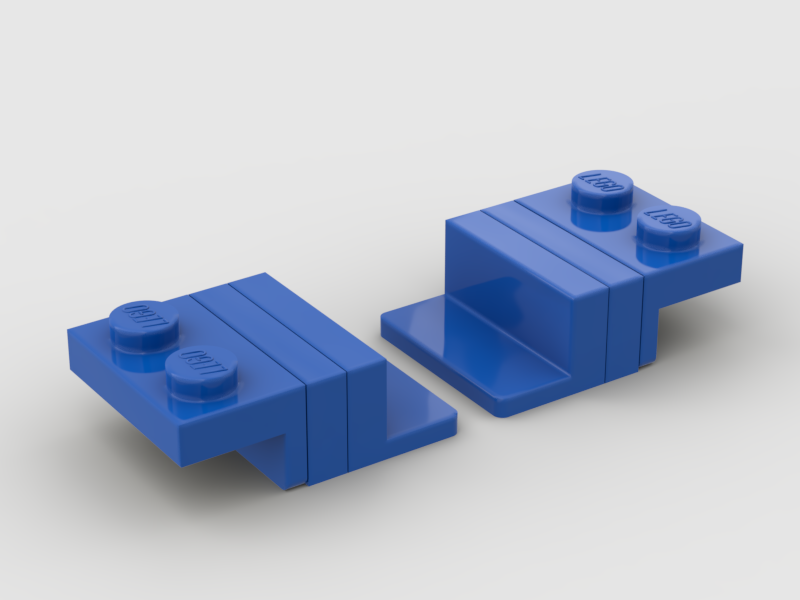
However, sometimes it’s just too… big. Luckily for us, there’s another common element type that’s less than a plate thick that we can use as a seat for our driver, and that’s panels! Specifically, in this case, the older mold variants without the added support side walls. (I discussed the effect of these mold changes in a previous BrickNerd article.)
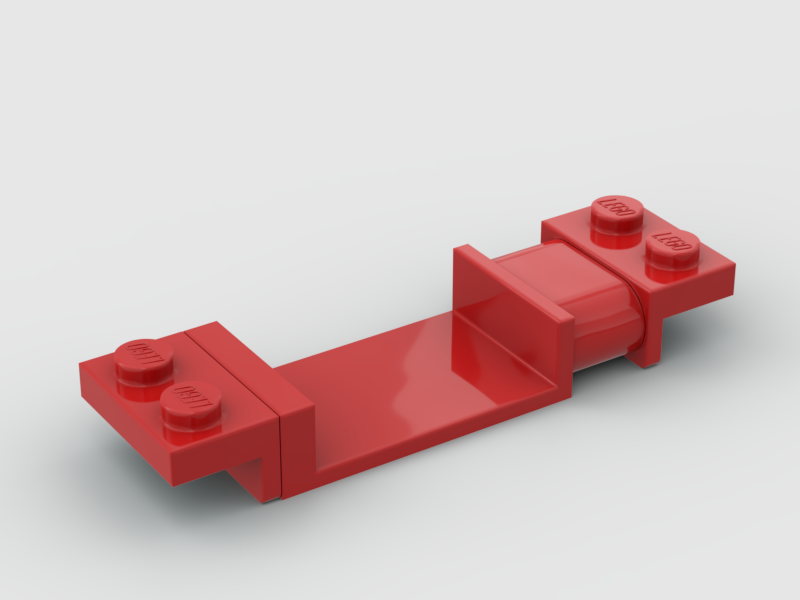
Here’s a cool bit of LEGO math: two brackets, a 1 x 2 x 3 panel, and a 2L liftarm are ([24*2)] + 72 + 20) = 140 LDU long, which is 7 studs long, so this simple and strong assembly is nice and snugly within system to build upon. In the following example, I’ve opted for this chassis because I’m using a technique for the rockers that takes up too much space to use an ordinary vehicle base—more on that shortly!
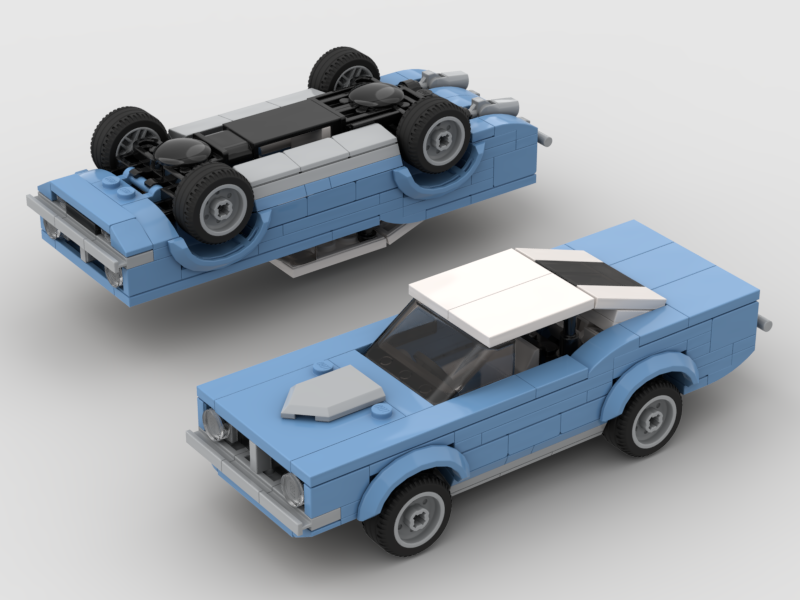
And if even THAT is too lengthy, we can use a pair of 1 x 2 x 1 panels instead to form our base. This is much less strong, since the two halves don’t connect to one another, but it only occupies 6 studs in length instead of 7.
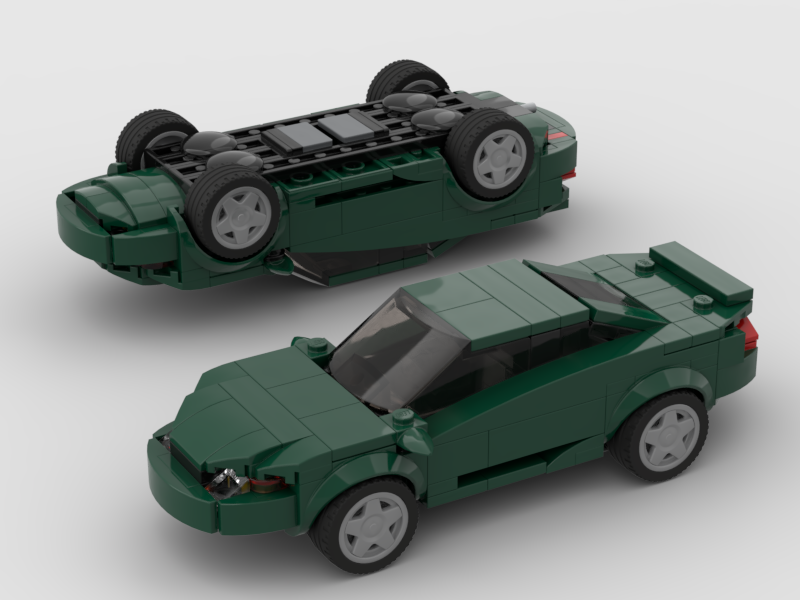
In the case of the following 8th gen Cougar, I used that solution because the vehicle base would have occluded with the dark green tiles making up the bottom of the sides, and the above panel solution was just a hair too long for this build.
Mudguards
There’s a nearly infinite number of ways to approach wheel wells, and a lot of them are fully custom brick-built solutions. I’m going to talk about some of the prefabricated mudguards LEGO has made, and when I would choose which types to use.
When it comes to older muscle and sports cars, there are really only a couple I’m considering using. This is because these cars tend to have more rounded, tub-shaped bodies, so I’m looking for a mudguard that isn’t too tall and/or is able to follow the curvature of the bodywork. Since we’re building in the 6W Speed Champions scale, we’re mostly only going to use City or Speed Champions wheels as well. This rules out most prefabricated options for being too large, too small, too tall, or too blocky.

The two I use all the time are the modern classic City mudguard, 98282, and the newer and curvier Speed Champions mudguard, 35789. The latter, in particular, does an excellent job of meshing with the kinds of bodywork these cars tend to exhibit due to its rounded corners and relatively low overall height. The City mudguard introduces some problems to solve, like gaps in its corners, but offers the flexibility of being able to fit connections, unusual bodywork, and things like half-plate offsets behind its fender. It also takes up much less space.
In the following image, I used the Speed Champions mudguard on the C3 Corvette due to its low profile and sweeping curves. I used the City mudguard on the Daytona because the whole nose is angled, so there are some connections in there that wouldn’t have fit with the larger amount of space the Speed Champions mudguard occupies.

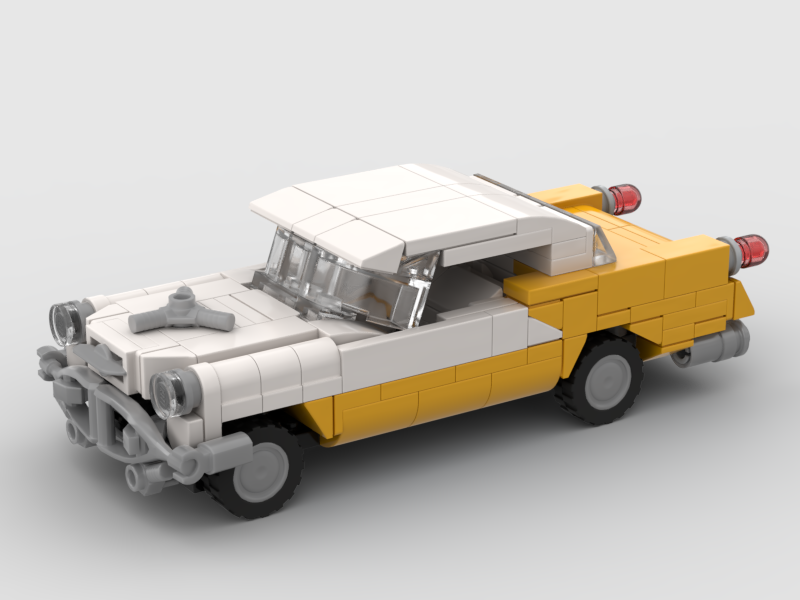
Of course, sometimes there simply isn’t a single mudguard that will work. For the following Oldsmobile 88, limitations in color and space combined with the SNOT-heavy side construction necessitated a more custom solution.
Rockers
This one’s really specific to the type of car I like to build. To clarify my terminology, I’m using the term “rockers” to talk about the bottom of the side of the car, whether it has pronounced rocker panel moldings or not. If you’re building supercars, you’re going to be focusing on aero/side skirts here instead. If you’re building a truck or SUV, you may not have a particularly pronounced rocker section of your car at all. But for muscle and sports classics, you frequently have some sculpting (usually an inward curvature or slope) to do here.
The most straightforward solution I tend to employ is sideways cheese slopes. These attach via brackets, so only occupy 1 vertical plate of space in the frame of your build. They complement either a studs-up or studs-out construction for your car’s sides perfectly seamlessly.
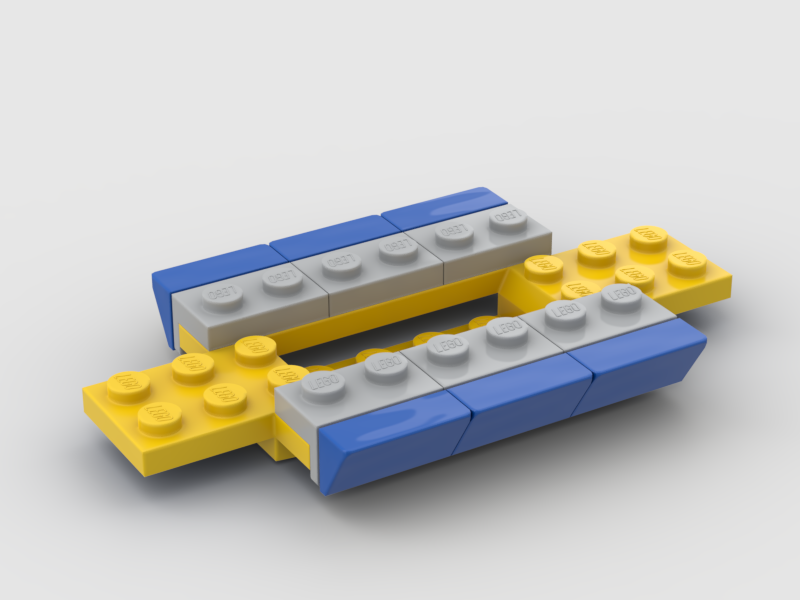
Much like how I describe my use of the Speed Champions fenders or the typical vehicle base above, this is sort of my “default” approach to rockers unless I’m working on something that needs a more specific or specialized solution. There are any number of cars I could pull for an example here, but we’ll look at this C10 truck:

But what happens if we need some metal trim, like an actual rocker panel molding, at the bottom of this angled section? We can always add a line of rail plates underneath the slopes, such as on this Nova gasser:
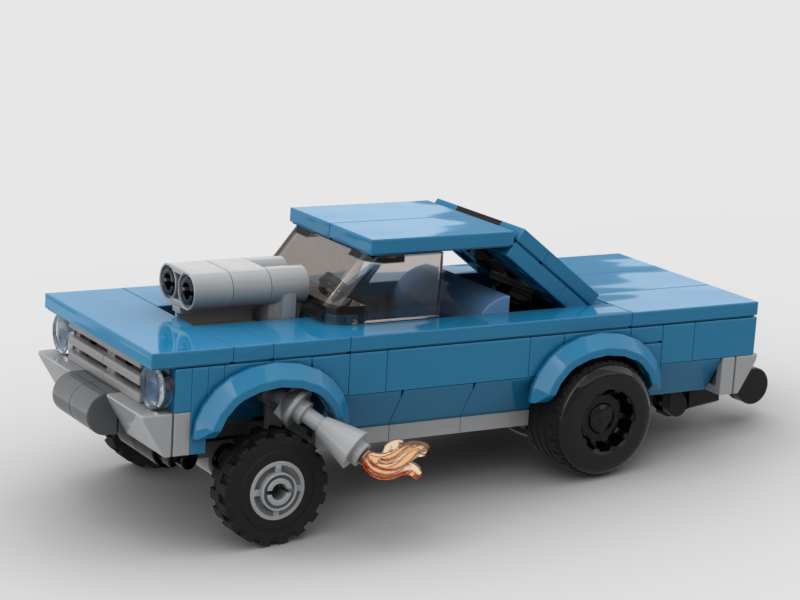
That approach has its own limitations, too. It gets difficult if the length of your rockers isn’t an even number of studs, if the height of them at the bottom doesn’t align with a plate, if the rocker molding isn’t at the very bottom of the panel on the real car, or if this overall construction is just too tall to look proper. In those cases, I use a totally different approach.
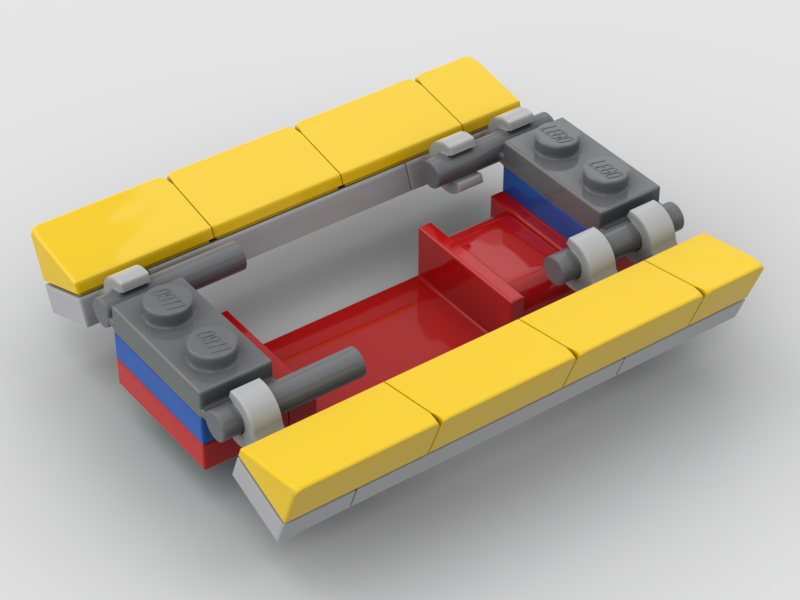
This technique using clips and rods pairs nicely with the panel chassis we spoke about before. It allows one to add that chrome rocker panel molding to the bottom of a much shorter sloped surface, or even add a streak of secondary color as well, all while maintaining that tub-shaped classic car bodywork. It’s a really satisfying and flush fitment that relies on the geometry of 3839b’s handles being placed so oddly.
I’ve used this on a number of cars now, but I’ll use this Riviera as an example of how it allows me to keep the entire car very low and sleek while still having these angled panels and trim.
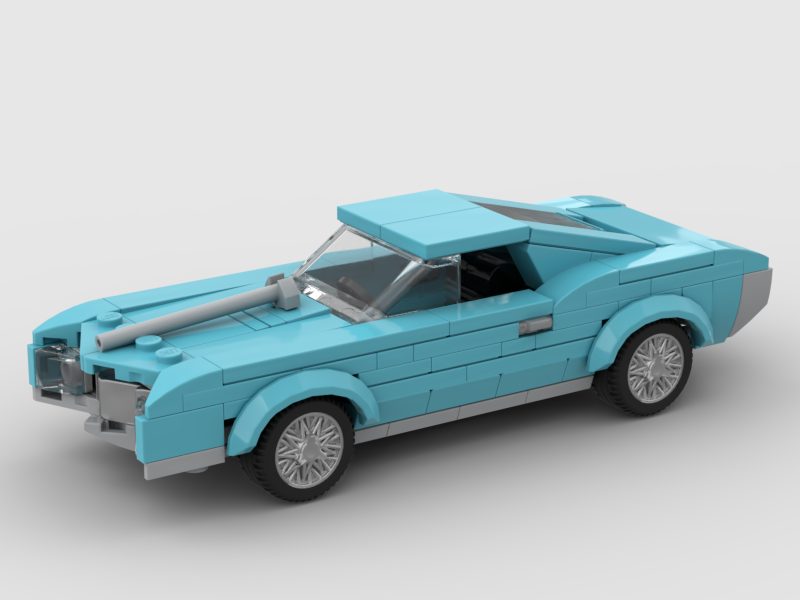
You can see there are quite a few ways to build the bottom of cars so that minifigures can better fit in 6-wide vehicles. From function to more aesthetic options, each will help you up your speed champions game.
So that, I think, is going to be a great stopping point for today. I’d love to keep talking about the techniques and elements I employ when building cars, though, so you can likely expect a follow-up article at some point!
My hope is that car builders find some of this information useful, non-car builders may learn something they can apply to other situations and models, and maybe- just maybe- I can inspire someone else to take a stab at my very favorite niche of LEGO building. And hey, let me know if I’ve missed anything obvious, or if there’s a specific aspect you’d like me to tackle next!
Questions? Leave your thoughts in the comments below!
Do you want to help BrickNerd continue publishing articles like this one? Become a top patron like Charlie Stephens, Marc & Liz Puleo, Paige Mueller, Rob Klingberg from Brickstuff, John & Joshua Hanlon from Beyond the Brick, Megan Lum, Andy Price, Lukas Kurth from StoneWars, Wayne Tyler, LeAnna Taylor, Monica Innis, Dan Church, and Roxanne Baxter to show your support, get early access, exclusive swag and more.

